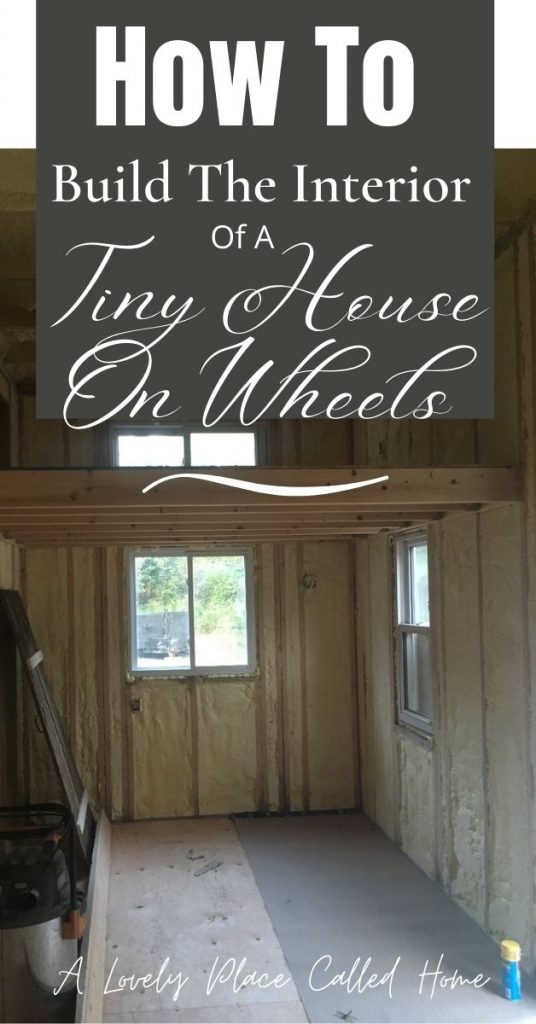
Welcome to part 4 of the series; how to build a tiny house yourself! In this post How To Build The Interior Of A Tiny House On Wheels, we will cover the interior side of things for our tiny house build, and hopefully we can help others who are trying to build their own tiny house as well!
In this post how to build the interior of a tiny house on wheels we will be covering a lot!
But we will focus on four main topics;
- Electrical
- Insulating
- Framing interior walls and lofts
- Laying the subfloor
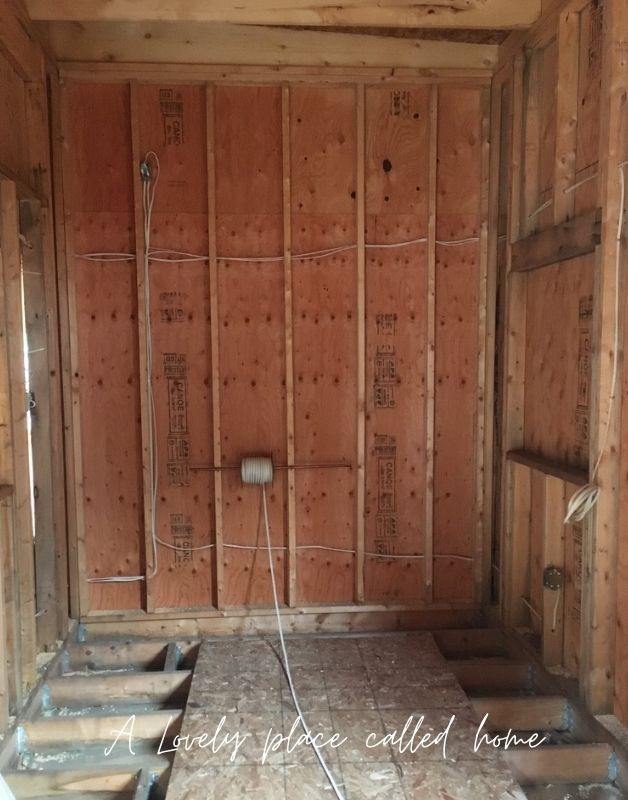
How We Did Electrical
Electrical was fairly easy in terms of labour.
We will be going off grid with a solar panel system but that doesn’t necessarily affect the way the house wiring is done. Though we were conscious of light fixture placement to ensure we will get the most light out of each one!
The real tricky part was making sure everything was exactly where it needed to be. Since it is such a tiny space every inch counts- even when it comes to outlet boxes. Just a few inches the wrong way and suddenly the whole layout of a room is ruined!
A well thought out floor plan
Make sure you have your floor plan very well thought out so that you know where to place outlets and light switches. Even furniture placement plays a huge roll, you wouldn’t want to place your main lightswitch where the future coat closet will be, or your living room outlet behind the future couch!
Since we framed with 2×4 (normal houses are framed using 2×6) we had to find a good place on an interior wall for the electrical panel since the exterior wall would’ve been too shallow.
The panel would’ve fit, but there wouldn’t have been an adequate amount of space behind it for insulation. So I chose an interior wall in the bathroom. Looking back I wish I would’ve put it in the kitchen wall, but it fits just fine in the bathroom.
Insulating
We chose spray foam insulation.
There are a number of reasons we went with spray foam insulation and I’ll quickly list them here.
- Using spray foam enabled us to do our faux board and baton siding since it acts as a seal against the elements
- The house will be so well insulated it will keep us toasty warm in the winter and will help keep out the heat of the summer, keeping us cool.
- My dad owns his own spray foam company and offered to install it for free, so we paid for the foam and the supplies only! It was still a costly investment, but we know it’s worth it.
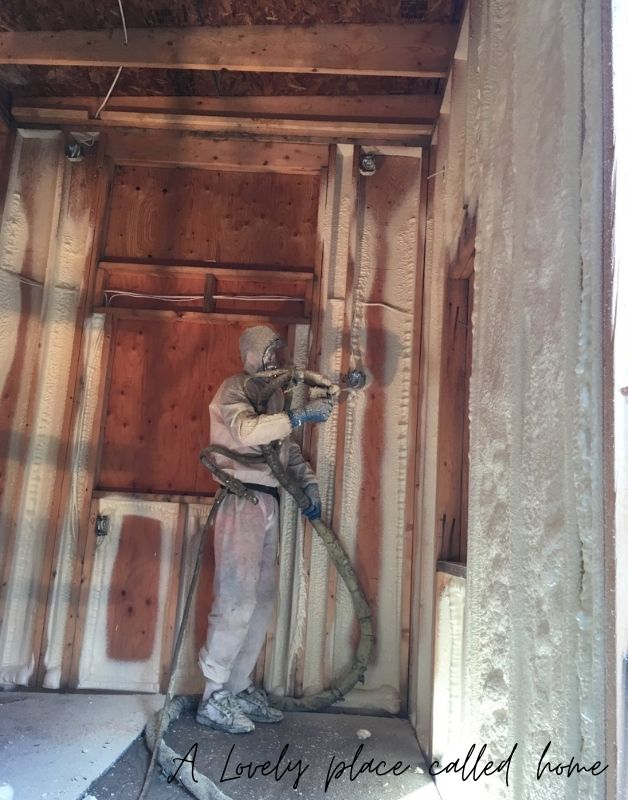
When spray foam is installed, “over spray” gets on the studs, and sometimes puffs out past the framing. So after its finished, you have to scrape all the extra foam away.
(If your hire out, the company may do this for you as part of the deal)
Scraping the extra spray foam off of the floor, walls, and ceiling was definitely the most time consuming part. What sucked was that I couldn’t help my husband with it. When you break open the freshly sealed spray foam it omits a small amount of toxins. After a few hours it’s completely safe again but even with a mask on we didn’t want to risk it since I was pregnant at the time!
This is why it is important to have your electrical complete before insulating like this, because you can’t just rip out wires and re run things. The spray foam is a total seal for maximum power.
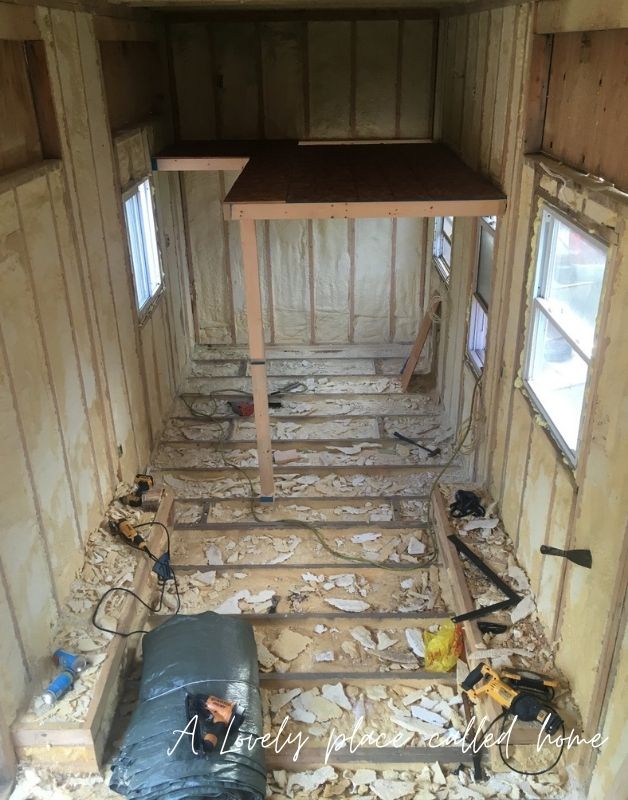
Laying the subfloor
I was so excited to do the floor. I think it’s because taking something that is normally considered ugly or unfinished, and turning it into something beautiful is so exciting for me!
The wood we used was 5/8 thick Spruce plywood. We made sure to install the sheets so that everything was centered and the seams were spaced apart evenly. We applied a generous amount of glue to the floor joists as we laid each piece to ensure its stability, then nailed it down.
Now, normally this is called a subfloor, and when you’re ready you would install a finished floor on top such as tile, vinyl, engineered wood, etc. But we are using this as our main flooring. When the time comes I will sand it down, stain it, and seal it.
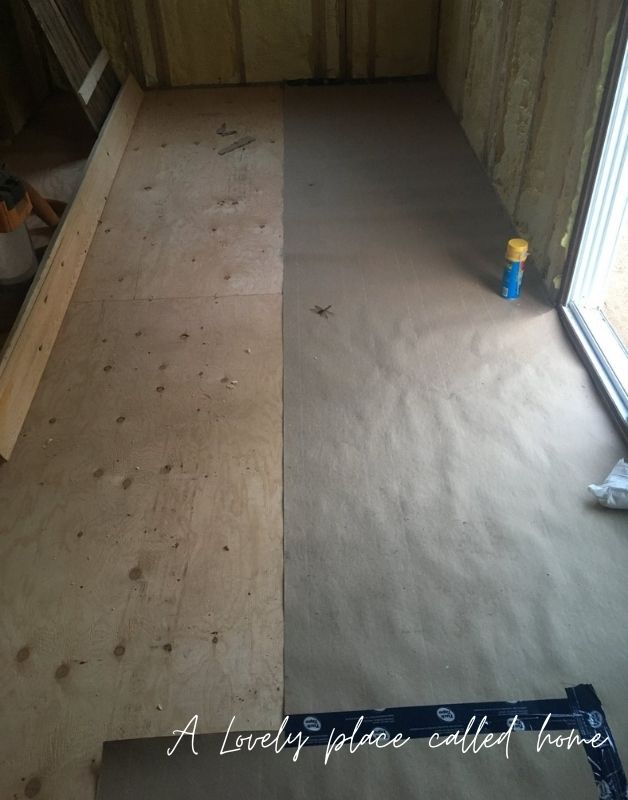
This will save us money and also so much weight! It will still provide a beautiful outcome, just wait and see!
Framing interior walls and lofts
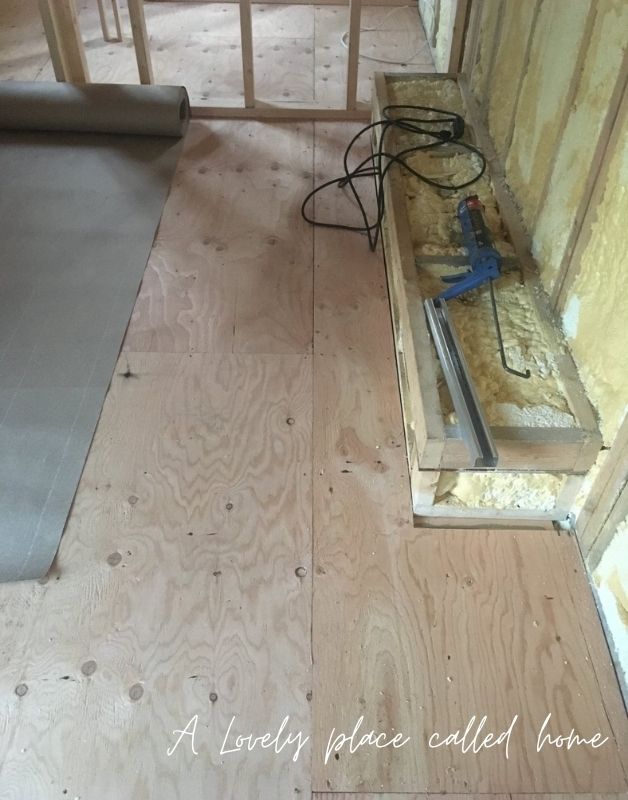
First was the wheel wells
It was challenging for me to design the framing around the wheel wells due to their shape and how we needed to insulate them. There was nothing online I could use for reference, so I had to just wing it and work with my husband on the best way to go about it.
We already had headers built on the exterior walls over the wheel wheels, and they sat at a proper distance above the wheels so we attached the interior framing to that.
We used 2×4’s and framed a box.
Then attached metal panelling (the same stuff we used for the floor, if you want to see that post its HERE) to the outside.
I didn’t get many pictures but I will attach the ones I have so you can get a visual!
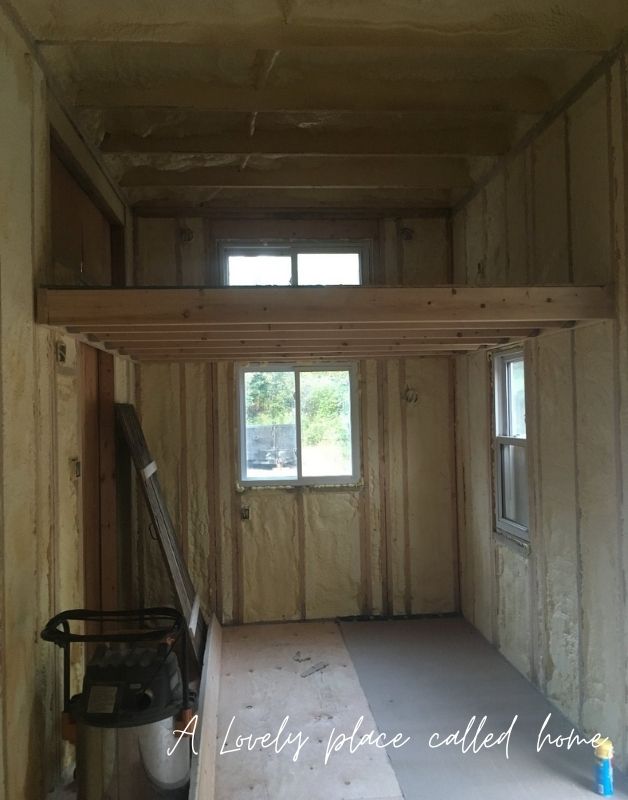
Lofts
Remember in my previous post where we framed the exterior of the tiny house? If you watch how we did it you will notice that I designed all of the windows and the man door at the exact same height.
Not only did that save us time and money but it was also planned so that our lofts could be bolted to all of the headers, and eliminate the need for posts to help support the lofts.
For our tiny house, we had two lofts. One was framed with 2×6 because it spanned the entire width of the house. And the other was built using 2×4’s because it had a number of supporting walls underneath. The height we ended up with on the 2×6 side was 3’2″, I’m happy about that!
You can frame your loft floor on the main floor and then hoist it up and secure it into place. Or you can build it where it is going to sit each piece at a time.
If you have two or more strong people I’d suggest building the entire structure on the floor and then lifting it into place.
But if you’re alone I would build it piece by piece into its place so that you don’t have to lift and balance so much weight at once.
We secured our loft floors to the headers along the walls with lag bolts and joist hangers.
Lofts bring so much stability and support to the tiny house. If you plan to build a tiny house as tall as ours I would highly suggest incorporating at least one loft!
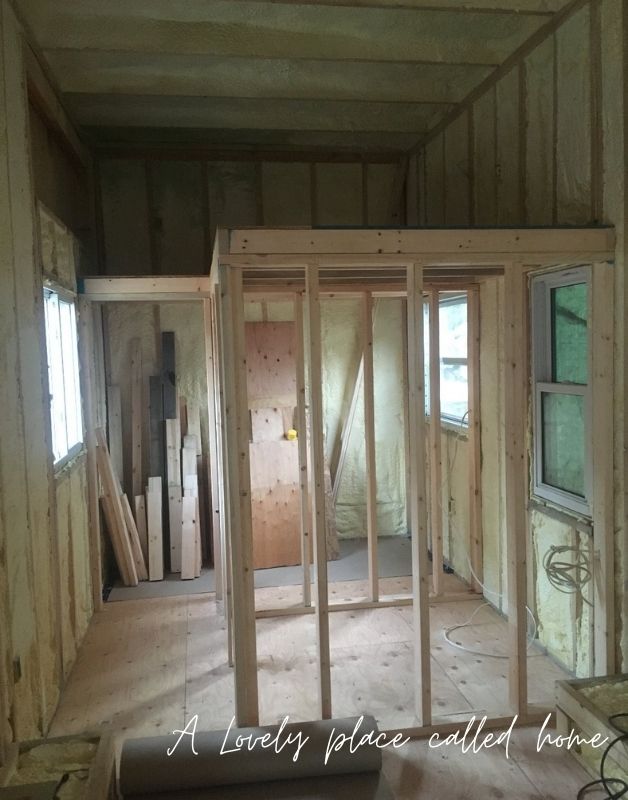
Interior walls
We built two rooms under the 2×4 loft. One bathroom and one bedroom.
Make sure when you are planning walls, that you have them set on the floor joists, and not between them. They need proper support and cannot be built on just the subflooring alone.
Also, our walls were helping to support the loft system, so it was very important to make sure they were built well and could support the load.
That was a lot to cover! Building a house has many steps, and when your building a tiny house on wheels, those steps seem to be even more tedious.
If you would like to see my previous posts in this series they are listed below:
How To Use A Camper Trailer Frame For Your Tiny House Build
HHow To Build A Tiny House Floor Onto A Camper Trailer Frame
How To Frame A Tiny House On Wheels
Join my members only hub and newsletter!
You’ll get access to my members only hub with free printables, e-books, checklists and more. And receive a monthly newsletter to let you know what has been happening on the blog that month!
To get your password sign up below!
How To Build The Interior Of A Tiny House On Wheels
how to build the interior of a tiny house on wheels
Follow me on instagram! alovelyplacecalledhomeinstagram


Normal homes are framed using 2x4s as well, excepting headers. We built two homes in Hawaii from the ground up and it is a lot of work! So many people don’t take into account the sheer amount of details to consider. I would love to build a tiny home! This is a great post, very thorough.
hey julie! Actually here in Ontario Canada all homes are framed using 2×6. 🙂 Due to weather conditions and snow load!
Actually a majority of homes are 2″x6″ exterior walls but not all, and this seems to be mainly due to the R-value requirements for insulation. Although they can be met in other ways as well. Also, I started framing when I was 15 and started my own framing company in my 20’s untill a retired from framing and I have never heard a ring joist referred to as a rimmer board. Occasionally a rim board but never rimmer. I know it’s petty and maybe it’s a Canadian thing but it’s literally driving me nuts…lol. over all Interesting article asi have been considering building a tiny home using a camper frame.and i was interested to see what others had experienced doing it this way. Thanks and good luck
Hey thanks for the reply! Rimmer is a very common way to say it here in Ontario Canada. lol. Thats what they teach in the carpentry school as well. Thank you for the well wishes!
This is so neat. I’m looking forward to following along and watching the progress.
thankyou! I hope to post the blog soon!
Can you tell me how you were able to estimate the weight of the house? I’m looking to build one myself, but I’m not sure how sturdy of a trailer I need.
my axles are rated for over 10,000 pounds dry weight. that’s listed on the axle rating of the trailer. For the house I literally would weigh everything and write it down. For example When we would buy a ton of 2×4 for the exterior I weighed one piece and wrote down the weight, then wrote down the amount of 2×4 we used. same with the weight of a spool of wire for wiring, the weight of each type of plywood used, a single sheet of steel for the roof. Then multiply the weight by the total number of pieces used. It sounds daunting but with such a small building it’s pretty easy to keep track!
Another easy way to get your weight (although this is after you’re finished) is to ask a local scrap yard to use their scale. I wouldn’t go to a roadside inspection station for obvious reasons lol