Welcome to post 2 in our series: How To Build A Tiny House Yourself.

This Post will explain how to build a tiny house floor onto a camper trailer frame!
Construction on our floor took a lot longer than we anticipated for our tiny house build. But looking back, it makes total sense. Not only is the foundation of our tiny house a metal frame on wheels, it’s also completely mobile! Our house will be flying down the highway, so we have to prepare for that!
This post is a runthrough on how to do it the way we did. We will not be covering basic construction skills or how to use tools.
Framing and adding security
Below are some of the things we did to frame our tiny house floor. I’m sure there are many ways you could do this, but this is how we did it, and it worked out fantastic!
We used 2×6 joists for the floor. The reason for this was since our trailer is a camper frame, there is no solid metal framing that runs along the outer perimeter of the trailer for us to lay our floor on. Instead, our floor overhangs the trailer frame by almost 12 inches on each side. Because of this, we used the bigger and stronger 2×6 joists. This ensures a strong floor that can hold the weight of our home.

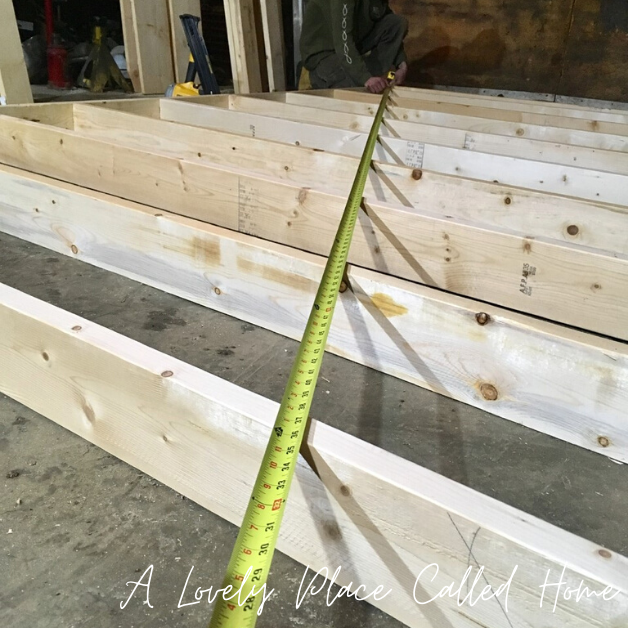
When measuring, make sure you factor in your Rimmer. These are the boards that are secured all around the outer edge of your framing once its complete. It makes your floor even stronger! Below is a picture of the rimmer board (left) attached to the framing of the floor AFTER it has been secured to the trailer. Make sure you measure everything correctly so that you can add the rimmer board at the end.

Build the floor in several pieces. We did this and I recommend you do the same if your floor will be longer than 12-15 feet long. That way you can frame on the ground and then move it with only two people onto the frame.
Once you’re finished framing you will need to square up the entire structure before adding the joists and metal that we will talk about below. This is easy to do but can become very frustrating because it can be a tedious job, so make sure you arm yourself with patience.

You will need a tape measure and preferably two people to make the process easier. Google exactly how to square up a structure using a tape measure if you do not know how to do it this way. Once it’s square, nail in extra wood on top of your framed piece so that it stays square while you move it around.
Secure the framing with joist hangers. This will make your frame even stronger. It might be overkill but I would rather have something “too strong” than not strong enough.

Metal sheeting for the underlay of the floor. We bought rolls of thin metal sheeting and attached it (with little screws) to the underside of the floor once we were finished the framing. Then we put it on the trailer frame. It’s so much cheaper and lighter than using plywood! Although the metal is thin, it acts as a barrier between the floor and frame. It’s thick enough to hold a lot of weight and repel rock and debris that the tires might kick up. It also acts as a critter deterrent!

Attaching the frame to the trailer
Once your finished framing make sure your trailer frame is as level as possible. We were lucky enough to have a laser level but if you don’t have one you can use a regular level (spirit level, bubble level).

After you level your trailer frame you can set your framed piece/pieces onto it and line each one up.
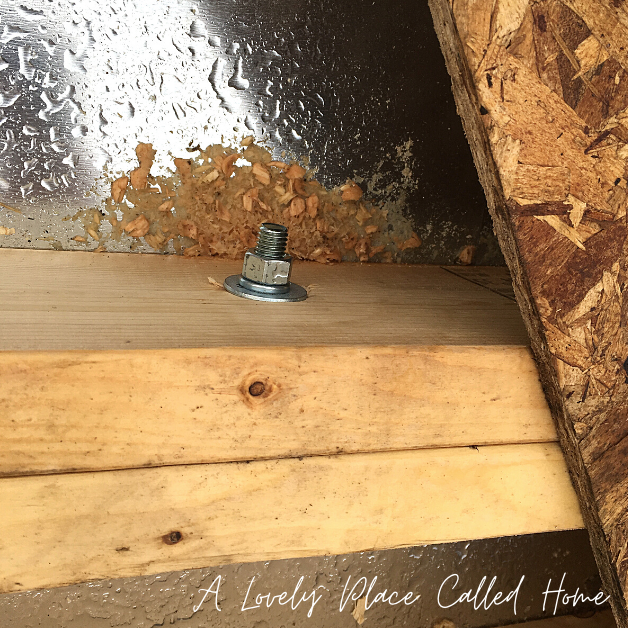
Pre drill your holes and connect the pieces using heavy duty bolts. Here are a few pictures of our bolts connecting the pieces we made.


Pre drill your holes where you will be bolting to the frame. Make sure your bolting to the most secure parts of your frame. You can choose to add more bolts to the other parts of the frame but it isn’t necessary.

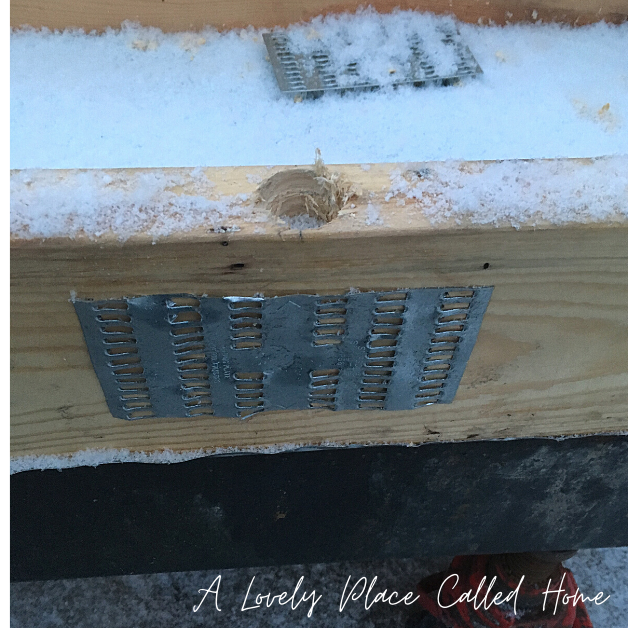
As an extra measure, we added gussets on each side of the wood where the bolts were. (Wow what an arm workout hammering in 30 gussets!) Just to make sure the wood would never crack under pressure. You always have to remember, this structure will be moving and flexing with an immense amount of weight attached to it!

Now is the time to nail on that rimmer board I was talking about earlier! As I said before, this has a few benefits:
- By adding the 2×6 rimmer to the outside of the floor we were able shorten the overall length of the 2×6 floor joists during framing. (This shortens the overhang of the floor framing from the trailer frame)
- It gives the floor even more stability, preventing the floor from flexing or bowing while moving down a highway.
- Doubling up the Joist header (rimmer plus floor frame) gives a thickness that is perfect for standing walls on.
We chose not to lay the plywood subfloor down until the rest of the house framing is complete and the spray foam insulation is installed. My dad is in the spray foam installation business and will be doing it for us. We talked with him about it and he said it would save money and time to do all of the spraying at once, instead of doing the floor first and then the rest of the house at a different time.
Keep this in mind when your framing your floor. Insulation is very important for your floor, and keeping it dry throughout the building process (if you don’t use spray foam) is SUPER important too. If you choose to wait and insulate your entire tiny house at once, that will give you the freedom to keep your house outside while building it, and it will save you money because when you do insulate it will be one job instead of several.
That’s it! Your floor is built and secured to the trailer frame. Now we get to move on to building the walls! Stay tuned for part 3 How To Build A Tiny House Yourself!
Before you go!
I hope you enjoyed this post! If you’d like more content like this, or receive full access to my members only hub and newsletter please put your email in the box below!
The hub is a password protected place where all of my created content lives, including printables, checklists, e-books, instruction manuals and more! Also, you will receive one monthly newsletter to let you know about all of the new content I have created that month!
I would love to have you be apart of the members hub.
Don’t forget to follow me on instagram! @alovelyplacecalledhome
Another popular post I have is: How To Build The Interior Of A Tiny house On Wheels
How To Build A Tiny House Floor On A Camper Trailer Frame – A Lovely Place Called Home
Thank you for the inforamation. I look forward to your monthly email. I’m excited about starting my own little house.
John Potter